May 22, 2024
OBS Studio Mac Installation Section
The following are the Mac specific information for Naginreed’s IRL guide.
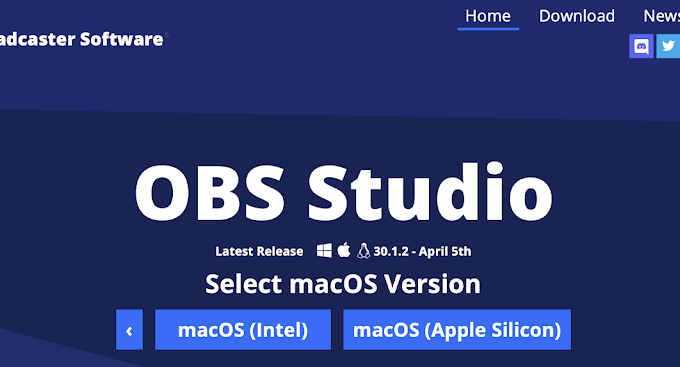
4.1.a – Download OBS Studio for your System.

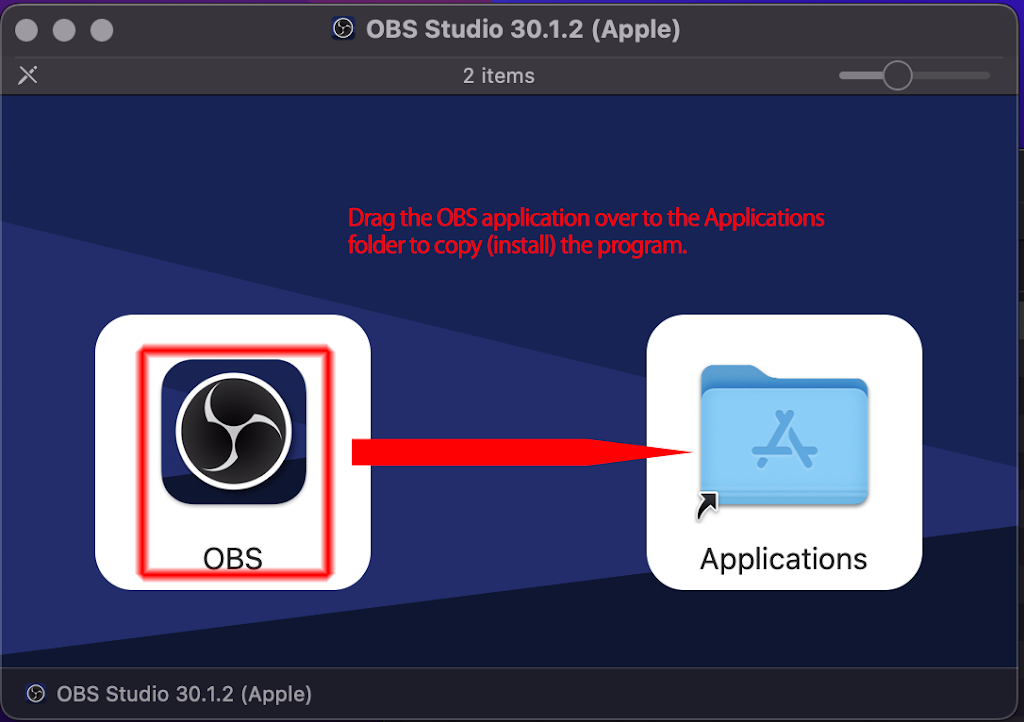
The download will be in a disk image format (default folder is Downloads).

4.1.b – Double-click the disk image file to open it and drag the OBS application onto the Applications folder to copy (install) it.
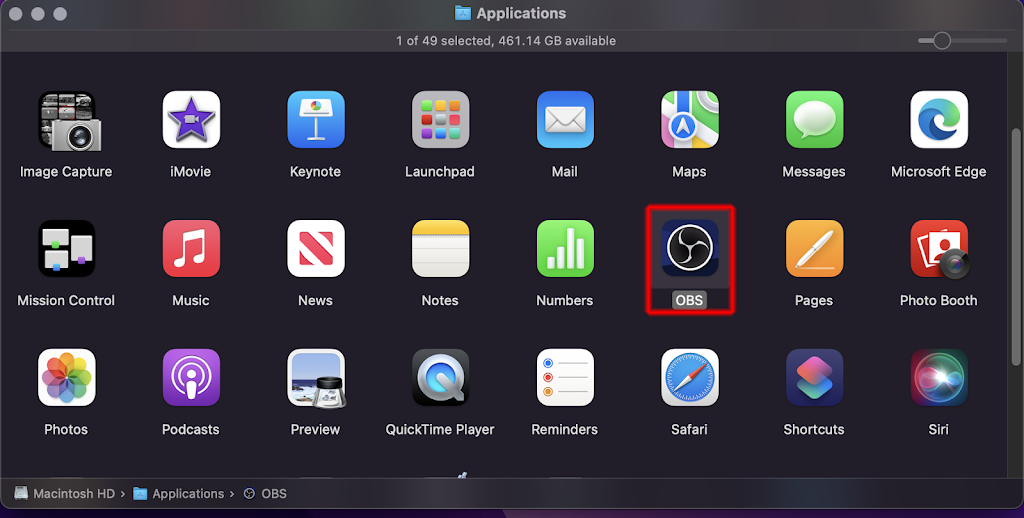
In the Finder, open the Applications folder and double-click OBS to launch it.
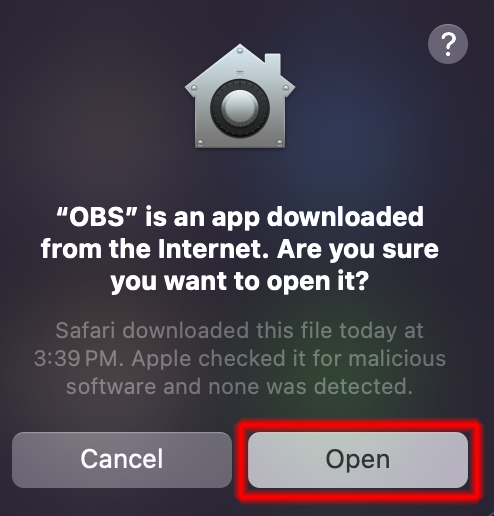
The system will put up a dialog like the following when running the application for the first time. Click on Open.
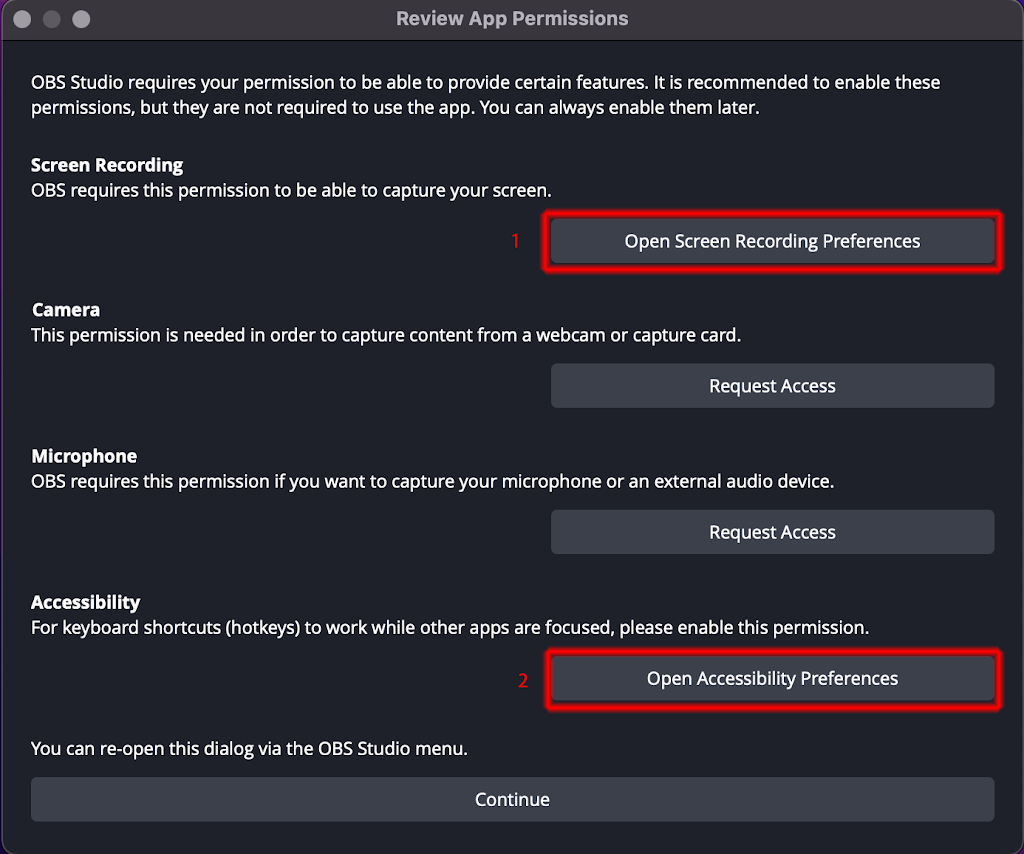
Newer versions of macOS have implemented greater degrees of security that requires an initial granting of permissions. Running OBS will prompt for a series of security and permissions related options (Review App Permissions) to allow it to function properly.
Note: The camera and microphone options are only required if utilizing the microphone and built-in camera on MacBook’s or an attached web camera on a desktop Mac to perform actual desktop streaming.
Optional: While the Screen Recording preference (1) is mainly to give system permission for OBS’ display capture, it also allows access to system audio functionality. If that access is needed, it can be enabled as follows.
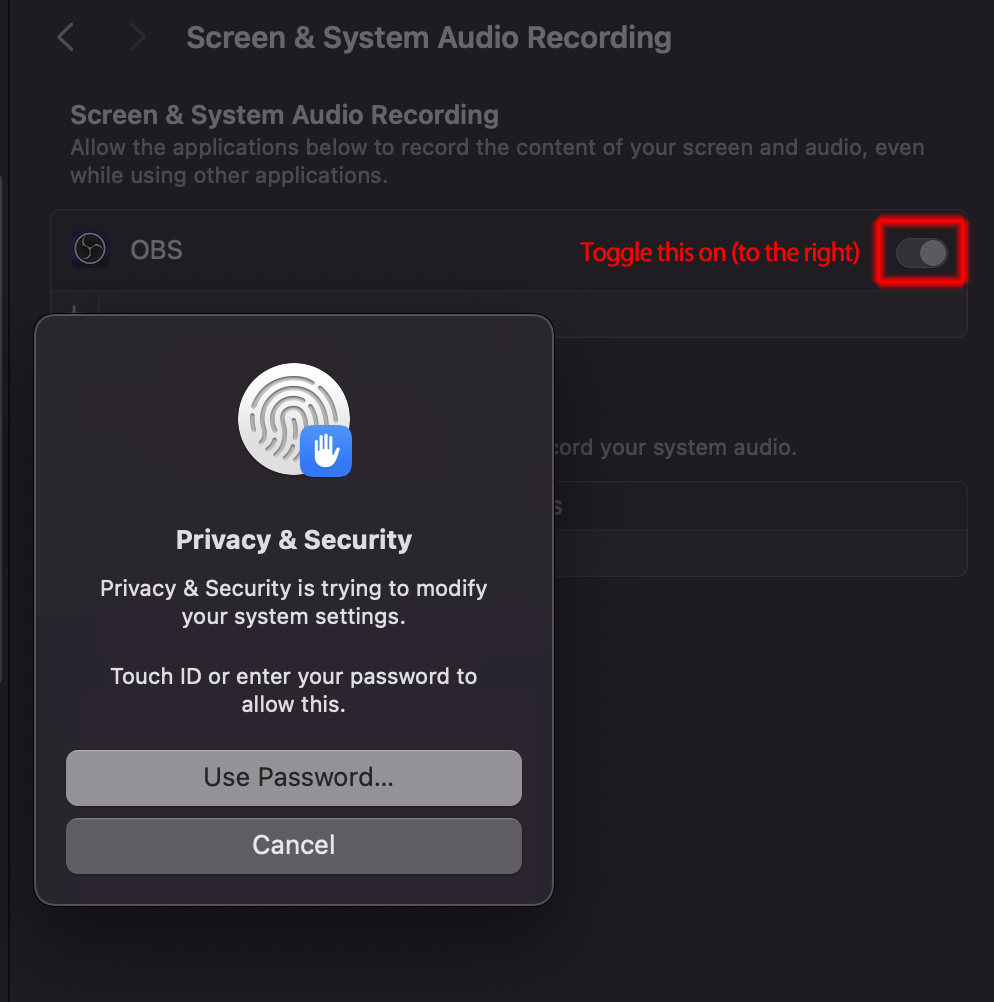
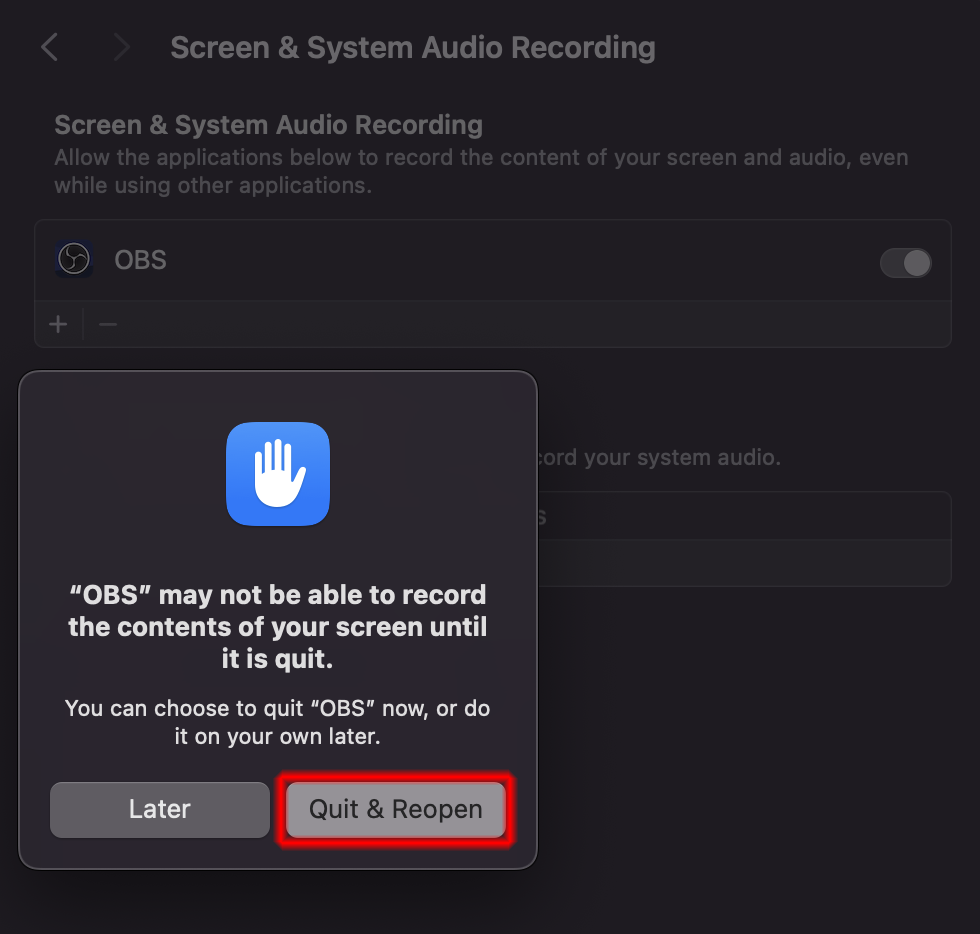
Click on Open Screen Recording Preferences and click on the toggle (if the toggle is to the right, this gives OBS permission to access that functionality). You will need to enter in the administrator password (or use Touch ID if applicable) as confirmation.
The system will then prompt to restart OBS (best to do this if testing). Select Quit & Reopen.
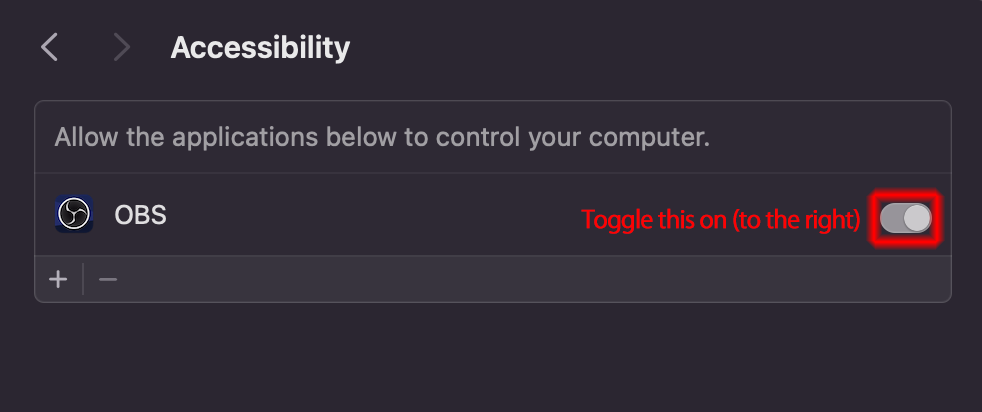
For the Accessibility (2) permissions, this is mainly for hotkey access (which is useful if using a remote controller application like OBS Blade) when OBS is not in the foreground/gets accidentally backgrounded. If you want to enable this, click on Open Accessibility Preferences and click on the toggle (if the toggle is to the right, this gives OBS permission to access that functionality). You will need to enter in the administrator password (or use Touch ID if applicable) as confirmation.
Finally, the system might display the following “System Extension Blocked” dialog.
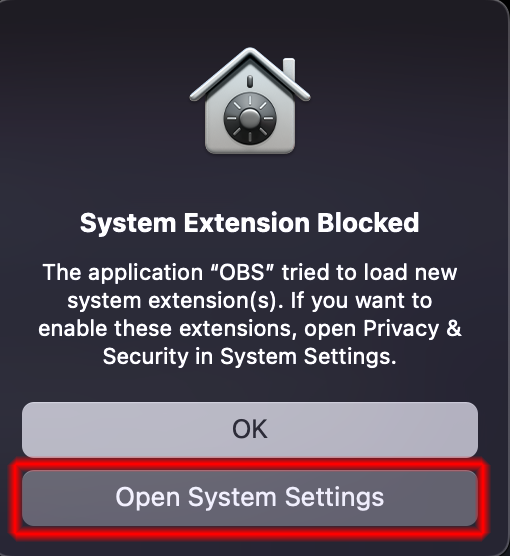
Click on “Open System Settings” and click on the “Allow” button.
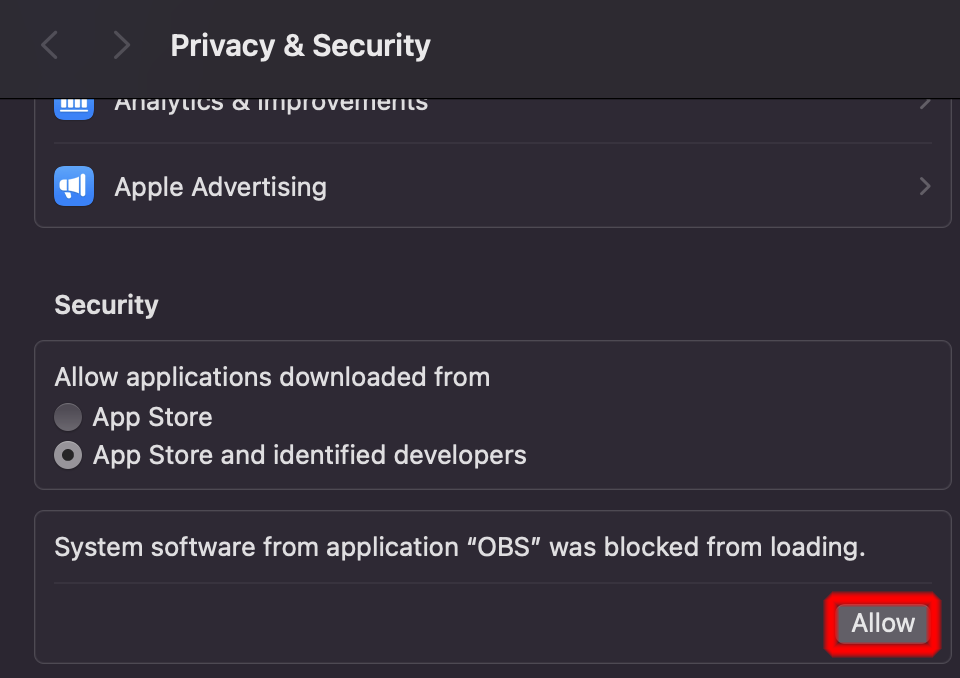
If prompted, you will need to enter in the administrator password (or use Touch ID if applicable) as confirmation.
This completes the setup of OBS Studio for Mac.
Note: the screens for 4.1.c and onwards are exactly the same for the Mac.